The art of drying oranges slices for decoration is a blissful intersection of simplicity and beauty. Drying oranges infuses your home with a natural, citrus fragrance and adds a touch of rustic charm to any decor. The main question that piques many crafters’ curiosity is how to achieve perfectly dried, aesthetic citrus discs that can adorn anything from Christmas garlands to potpourri mixes. This article will illuminate the process of drying oranges slices in a way that they become completely dry, vibrant, and ready for your decorating desires. The process can take a few hours, but it’s so easy and the results are so beautiful that it’s well worth the effort.
Preparing Your Oranges for Drying
To start, choose the right types of oranges – those with a lower pulp content and a firmer structure are ideal, as they tend to dry better and retain their shape. You might also explore other citrus fruits, like lemons or grapefruits, adding even more variety to your decorations. Once you’ve selected your fruit, wash the oranges thoroughly to remove any pesticides or wax. Then place them on a cutting board and slice them into even pieces, aiming for about 1/4 inch thickness; the thinnest slices will dry the quickest but might not retain as much structure after drying.
When slicing, keep in mind that uniformity is key. Uneven slices will take different times to dry, which could complicate the drying process. For the most consistent slices, use a sharp knife or a mandoline slicer. These tips for even slicing ensure that your orange slices are not only so beautiful but will also dry uniformly.

Setting Up Your Oven for Drying
Now, for the heart of the operation: drying oranges. The optimal temperature for drying citrus fruits in your oven is around 200 degrees Fahrenheit – a setting that permits moisture to evaporate without cooking the fruit. Before you begin, prepare your baking racks; you can line them with parchment paper to catch any drips and prevent sticking. Then arrange your orange slices in a single layer, ensuring they don’t overlap, as this could also affect how evenly they dry.
- Preheating the oven to 200 degrees Fahrenheit.
- Preparing your baking sheets with parchment and arranging the slices.
The Drying Process
The process of drying orange slices in your oven can last from 2 to 6 hours, depending on the thickness of your slices and your oven’s performance. You’ll want to flip the slices occasionally, perhaps every hour or so to ensure they dry evenly. It’s important that your orange slices become completely dehydrated; otherwise, they could take on mold once stored. If you’re in doubt, it’s better to let them dry a bit longer, as under-dried fruit will not preserve well.
| Oven Time | Checking Frequency | Slice Thickness |
|---|---|---|
| 2-6 hours | Every hour | 1/4 inch |
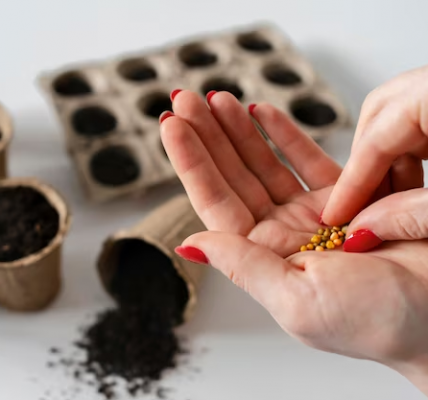
- Fresh oranges or other citrus fruits
- Sharp knife or mandolin slicer
- Baking sheets
- Parchment paper
- Oven preheated to 200°F
Stay vigilant during the drying process, as the time it will take can differ based on your specific conditions. The slices should not become brown or crispy; if you notice this happening, the temperature may be too high, and you might need to adjust your oven settings. Remember, completely dehydrated orange slices will last longer and look more beautiful in your decorations.

After the Oven: Post-Drying Steps
Once your orange slices have emerged from the oven looking beautifully translucent and are completely dehydrated, it’s essential to let them cool down. Place them on cooling racks to ensure even air circulation on all sides. This part of the process shouldn’t be rushed—the slices must be cooled completely before you proceed with any kind of decoration or storage. Only when they are at room temperature can the full effect of their drying be evaluated; any residual moisture might not be evident when they’re still warm.
After your slices have cooled, you may find that they’re not as dry as you had hoped. If this is the case, you can return them to the oven for additional drying. Be cautious with this additional step; the goal is to remove lingering moisture, not to over-dry or brown the fruit. Patience here is key—low and slow is the mantra of the drying process. You’ll know they are ready when they feel dry to the touch with no stickiness at all.
Storing dried orange slices properly also ensures that they will last a long time, retaining their color and fragrance. Place them in an airtight container, separated with layers of parchment paper to prevent sticking. Stored in a cool, dry place, your beautiful citrus decorations can last through the season and well into the next year if kept out of direct sunlight.
Creative Ways to Use Dried Orange Slices
Dried orange slices are incredibly versatile and can be incorporated into a variety of decorative ideas. Here’s how you can use them:
As Christmas Ornaments
Adding a ribbon or twine through a small hole at the top of an orange slice allows you to create natural Christmas tree ornaments. They catch the light beautifully and give a rustic look to your holiday decor. You could also include additional embellishments such as cloves or a dusting of glitter to make them even more festive.
In Garlands and Wreaths
By stringing dried orange slices together with other elements such as cinnamon sticks, pine cones, and cranberries, you can create stunning garlands to drape over a mantel or around a staircase. For wreaths, affix the dried slices to a base using floral wire, creating a beautiful citrus garland for your door or windows.
Potpourri and Other Scented Decor
Dried orange slices can be a key component of homemade potpourri. Combined with other dried items and essential oils, they provide a long-lasting fragrance. They can also be added to gift baskets or scattered on tables as part of a centerpiece, bringing both visual appeal and a pleasant aroma.
With creativity, the applications for your dried orange slices are endless. Whether they’re used in Christmas garlands, added to floral arrangements, or simply placed in a bowl as a decoration, dried orange slices provide a touch of natural elegance and a lovely scent.

Conclusion
The drying of orange slices is an accessible process that invites both creativity and simplicity into your home. While it might seem like an exercise in patience, the delightful results—a collection of beautiful citrus pieces for decoration—are well worth the wait. Whether adorning a glowing Christmas tree, amplifying the elegance of a wreath, or enhancing the aromatic appeal of potpourri, the applications are boundless. What’s more, your dried orange slices are not only pleasing to the eyes and nose but can last long beyond the season, bringing joy and beauty into your space time and time again. So, set your ovens, prepare your oranges, and let the crafting journey begin!
FAQs
1. How long does it take for orange slices to dry in the oven?
It usually takes between 2 to 6 hours for orange slices to dry in the oven, depending on their thickness and the consistency of your oven’s temperature. It’s important to check them frequently and turn them over hourly to ensure even drying.
2. Can you dry other fruits using this same method?
Absolutely! This technique can be applied to other fruits, such as lemons, limes, apples, and pears. The drying times might differ, so it’s essential to keep an eye on them and adjust the process as necessary.
3. How do you know when the orange slices are completely dry?
Orange slices are completely dry when they feel leathery and pliable without any stickiness. If they’re still damp, they might require more time in the oven. Remember, they should not be brown or crispy; if they are, the oven temperature might have been too high.
4. How should dried orange slices be stored to ensure they last long?
Store the completely cooled orange slices in an airtight container, with layers of parchment paper between them to prevent sticking. Keep the container in a cool, dry place away from direct sunlight to help them last for months.
5. What are some precautions to take while drying orange slices in the oven?
Avoid overlapping the slices on the baking sheet as this will lead to uneven drying. Keep the temperature around 200°F to prevent cooking or burning the slices, and remember to turn them every hour. Always allow the slices to cool completely on cooling racks before storing or using them for your decoration projects.