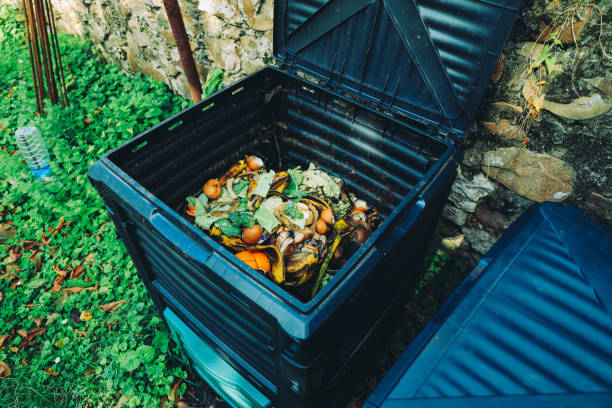
Building a compost bin is a fantastic way to recycle your kitchen scraps and yard waste into nutrient-rich compost for your garden. This article will guide you through the step-by-step process of building your own compost bin, ensuring that you make an environmentally friendly choice that also benefits your plants.
Choosing the Right Location

The first step in building a compost bin is selecting an appropriate location. Ideally, you want a spot in your yard that is easily accessible but not too close to your home, to avoid any odor issues. It should be a flat, well-draining area to prevent water from pooling. Additionally, the location should have partial sunlight—too much sun can dry out your compost, while too little can slow down decomposition.
Gathering Materials
Once you’ve picked a location, the next step is gathering your materials. The most common materials for building a compost bin include wooden pallets, wire mesh, or a plastic container. Here is a list of basic items you will need:
- Wooden pallets or a large plastic container
- Screws or zip-ties
- Wire mesh (optional)
- Drill or screwdriver
- Measuring tape
Ensure that all materials are untreated and free of harmful chemicals, as these can contaminate your compost. Once you have everything you need, you can begin the construction process.
Constructing Your Compost Bin
Start by building the frame for your compost bin. If you’re using wooden pallets, align four pallets vertically to form a square or rectangular shape. Use screws or zip-ties to secure the corners together. If you’re using a plastic container, drill holes evenly around the sides and bottom to allow for airflow and drainage. Ensure that the structure is sturdy and can withstand the weight of the compost material.
If you opted to use wire mesh, this can be secured to the interior walls to keep smaller compost items from spilling out. The bin should have at least one open side for easy access to turn the compost materials and remove the finished compost.
Starting Your Compost Pile
With your compost bin constructed, the next step is starting your compost pile. Begin by adding a layer of coarse material, like sticks or straw, to help with aeration and drainage. Follow this with alternating layers of green (nitrogen-rich) and brown (carbon-rich) materials. Green materials include kitchen scraps, grass clippings, and coffee grounds, while brown materials include leaves, cardboard, and paper.
Maintain a balance between the green and brown layers to ensure efficient decomposition. Water each layer lightly to keep the pile moist, but not soggy. The pile should feel like a damp sponge—too much water can lead to a smelly compost pile, while too little can slow down the decomposition process.
Maintaining Your Compost Bin
Regular maintenance is key to successful composting. Turn your compost pile every few weeks to aerate it and speed up the decomposition process. Use a pitchfork or a compost turner to mix the materials, making sure to move materials from the edges into the center.
Monitor the moisture levels and adjust as needed, adding water during dry conditions and brown materials if it becomes too wet. Within a few months to a year, depending on the conditions, your compost should be ready to use. The finished compost will be dark, crumbly, and have an earthy smell.
Conclusion
Building a compost bin is a rewarding project that enables you to recycle kitchen scraps and yard waste into valuable compost for your garden. With the right location, materials, and maintenance, you’ll be well on your way to creating a sustainable and eco-friendly composting system. Follow the steps outlined in this guide to ensure your compost bin is effective and efficient.
FAQs
1. What materials should I avoid adding to my compost bin?
Avoid adding meat, dairy, oily foods, and pet waste to your compost bin, as these can attract pests and create odors.
2. How often should I turn my compost?
It’s recommended to turn your compost every few weeks to ensure proper aeration and speed up the decomposition process.
3. Can I compost in the winter?
Yes, you can continue composting in the winter. However, the decomposition process will slow down in colder temperatures, so be patient.
4. How do I know when my compost is ready to use?
Your compost is ready when it is dark, crumbly, and has an earthy smell. This can take anywhere from a few months to a year, depending on various factors such as moisture and temperature.
5. Do I need a lid for my compost bin?
A lid is not necessary but can help keep pests out and control moisture levels. If you choose to use a lid, make sure it’s not airtight, as compost needs airflow to decompose properly.


